This past week, I’ve been working on a PHP script that pulls data from an API and emails a report to me once it’s ready. The script runs every morning at 00:01am via cron event, like so:
1 0 * * * php /home/michelle/path/to/my-script.phpTo send emails in my script, I called PHP’s built-in mail() function. Using this function takes a bit of server configuration, though. As specified in PHP’s Mail Requirements, I installed sendmail on my DigitalOcean droplet. All was well, and I now had the power of email notifications within my automation scripts. I was overcome with inspiring ideas of other reporting scripts that I could write!
Before long, however, Google had blocked my server’s IP from sending emails to my Gmail address. Ugh! I even had my script’s sender address added to my contact records and created a filter to ensure all those emails were marked as important and landed in my inbox. Still, Gmail could not verify the sender, so it makes sense they ultimately blocked it. Without proper identification, anybody could send emails as whatever address they want. That’s obviously not safe and should not be allowed.
Facing an email deliverability issue, I immediately looked to Mailgun for solutions. I’m now shocked that sending emails reliably in PHP can be this easy and with no server configurations!
Using Mailgun’s API without adding more dependencies
When looking to make use of an API, it’s certainly tempting to first check if the vendor offers a pre-built library in your project’s coding language. Don’t get too excited, though, when you see PHP in Mailgun’s list of official libraries! Adding full-feature libraries to your project’s list of dependencies can be overkill. This is especially true for my automation script which only needs to make use of one of Mailgun’s API endpoints. Furthermore, my project has not needed any other dependencies thus far. This means I’d need to implement package management just to make use of the library via Composer.
Before implementing any dependencies, you should absolutely assess the cost-benefit of including such libraries. As I’ll show you below, implementing the Messages endpoint of Mailgun’s API in PHP is incredibly straight-forward.
Sending emails in PHP via Mailgun’s API
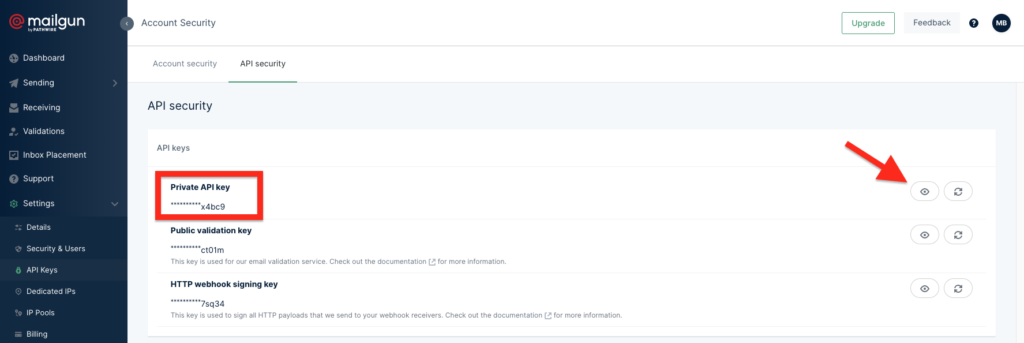
Since Mailgun’s API allows basic authentication, it’s as simple as providing the Private API Key in your Mailgun account. Just log into your Mailgun account and go to Settings > API Keys to copy your Private API Key to authenticate API access.
After that, you’ll also just need to copy the domain name you’d like to send emails from in your PHP script. You can review your available domain names by navigating to Sending > Domains while logged into your Mailgun account.
I’m personally just making use of the sandbox domain—which is randomly generated and included in every Mailgun account. This is because I don’t want my poorly-composed system emails to potentially affect my actual domain’s email reputation. Just note that your sandbox domain in Mailgun is limited to 5 Authorized Recipients. This was perfect for me, though, since my PHP script will only ever send emails to me and another teammate. Using a separate email domain for my automation scripts than my production website also keeps the email logs organized in Mailgun.
After you’ve copied your Private API Key and decided which domain you’d like to use, you can send emails reliably by using PHP’s cURL functions like so:
<?php

 $mailgun = [
     'apiKey' => 'YOUR_PRIVATE_API_KEY',
     'domain' => 'YOUR_EMAIL_DOMAIN',
 ];

 $ch = curl_init();

 curl_setopt( $ch, CURLOPT_HTTPAUTH, CURLAUTH_BASIC );
 curl_setopt( $ch, CURLOPT_USERPWD, "api:{$mailgun['apiKey']}" );
 curl_setopt( $ch, CURLOPT_RETURNTRANSFER, 1 );

 curl_setopt( $ch, CURLOPT_CUSTOMREQUEST, 'POST' );
 curl_setopt( $ch, CURLOPT_URL, "https://api.mailgun.net/v3/{$mailgun['domain']}/messages" );
 curl_setopt( $ch, CURLOPT_POSTFIELDS,
     [
         'from' => "Automation Script <cron@{$mailgun['domain']}>",
         'to' => '[email protected]',
         'subject' => 'Testing Mailgun\'s API',
         'text' => "This is a new line\nThe next line.\r\nLine after CRLF.\n<strong>This won't work unless you use the 'html' param.</strong>",
     ]
 );

 $result = curl_exec( $ch );
 curl_close( $ch );

 print_r( $result );
 /*
 Success response is like:
     {
         "id": "[email protected]",
         "message": "Queued. Thank you."
     }
 */
By the way, I use Mailgun for free
For large businesses looking to rely on third-party services, API usage can add up to a hefty expense. If you’re needing to send less than 1,000 emails per month, though, you could definitely find yourself never paying a dime, like me, for this essential service.
Be sure to check out Mailgun’s pricing and review your email usage to know if it’s right for your business. It is always my number one recommendation to clients struggling with email deliverability and inbox placement. I’ve also known many professionals and businesses already happily using Mailgun.
Using Mailgun for WordPress email deliverability
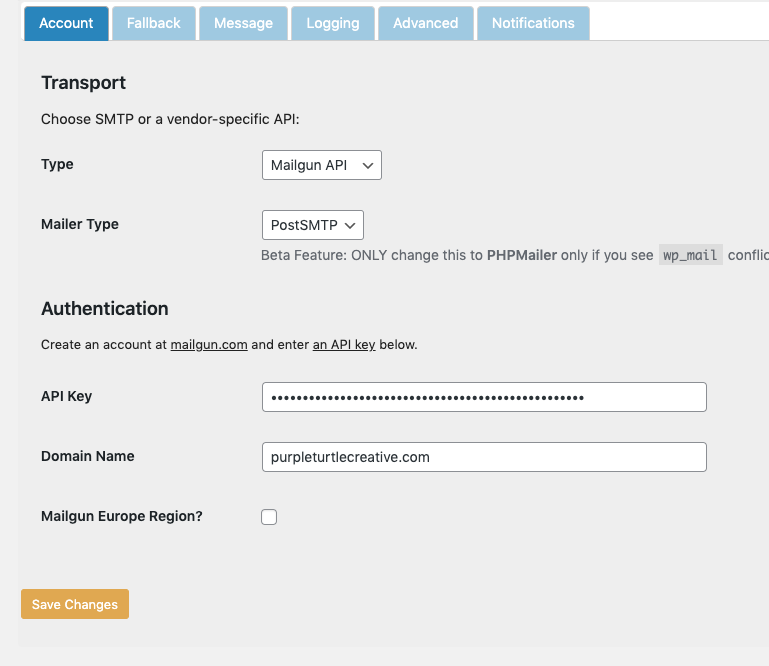
If you’re looking to use Mailgun to improve emails from your WordPress site, then you likely don’t need to worry about a custom code implementation. I have always used and highly recommend the free WordPress plugin Post SMTP by Yehuda Hassine. It offers more features than bigger name SMTP plugins and also doesn’t withhold any features for ransom.
Simply choose Mailgun’s API as the type of provider and enter your Private API Key and Domain Name. You can find this information in your Mailgun account as I explained above with direct links for you.